
How To Sow Tomato Seeds Indoors
Starting tomato seeds indoors is a rewarding and cost-effective way for gardeners to get a head start on the growing season.
By sowing seeds indoors, you can control the growing environment, select your favorite varieties, and ensure a steady supply of healthy tomato seedlings ready to transplant into the garden come spring.
Starting tomatoes from seed may seem daunting at first, but with the right materials, techniques, and attention to detail, anyone can successfully grow their own tomato plants from seed.
In this article, we’ll dive deep into the step-by-step process of sowing tomato seeds indoors, from understanding the germination process to caring for your seedlings until they’re ready to be hardened off and transplanted outdoors.
We’ll cover the materials you’ll need, best practices for success, and common mistakes to avoid. Whether you’re a seasoned gardener or a beginner, this comprehensive guide will give you the knowledge and confidence to start your own tomatoes from seed and enjoy a bountiful harvest of homegrown tomatoes. So, let’s get started on this exciting journey of growing your own tomatoes from seed to fruit!
Understanding the Germination Process
Before we dive into the practical steps of sowing tomato seeds indoors, it’s essential to understand the germination process and the factors that influence it. Tomato seeds typically germinate within 5 to 10 days when provided with the right conditions, which include adequate moisture, warmth, and oxygen. The optimal temperature range for tomato seed germination is between 65°F and 85°F (18°C to 29°C), with the sweet spot being around 75°F to 80°F (24°C to 27°C). At these temperatures, the seeds will sprout quickly and uniformly, giving your seedlings the best start possible.
It’s important to note that while tomato seeds need moisture to germinate, they don’t require light at this stage. In fact, too much light can inhibit germination, so it’s best to keep your newly sown seeds in a warm, dark place until they sprout. Once the seedlings emerge from the soil, they’ll need to be immediately exposed to bright, direct light to prevent them from becoming leggy and weak.
To speed up the germination process, some gardeners choose to pre-soak their tomato seeds before planting. Soaking the seeds in room temperature water for 12 to 24 hours can soften the seed coat and encourage faster germination. Another technique is to use a heat mat underneath your seed trays to provide consistent bottom heat, which can significantly improve germination rates and speed. Heat mats are especially useful if you’re starting your seeds in a cool room or during the early spring when ambient temperatures may be lower than ideal.
Once your tomato seeds have sprouted, it’s crucial to remove any humidity dome or covering from your seed trays. Seedlings need good air circulation to prevent damping off, a fungal disease that can quickly kill young plants. Providing your seedlings with plenty of bright, direct light will also help them grow strong and sturdy, preventing them from becoming leggy and weak.
By understanding the factors that influence tomato seed germination and providing your seeds with the optimal conditions for sprouting, you’ll be well on your way to growing healthy, vigorous tomato seedlings that will thrive in your garden.
Materials Needed for Starting Tomato Seeds Indoors
Before you begin sowing your tomato seeds, it’s essential to gather all the necessary materials to ensure a successful start. Here’s a list of the key supplies you’ll need:
- Seed Starting Mix or Sterile Potting Soil: It’s crucial to use a high-quality, lightweight, and well-draining seed starting mix or sterile potting soil. These specially formulated mixes are designed to provide the ideal environment for seed germination and early seedling growth. They are typically made from a combination of peat moss, vermiculite, and perlite, which helps retain moisture while allowing excess water to drain away from the roots. Avoid using garden soil or regular potting soil, as these can be too heavy, may contain weed seeds, and can harbor disease-causing organisms that can harm your delicate seedlings.
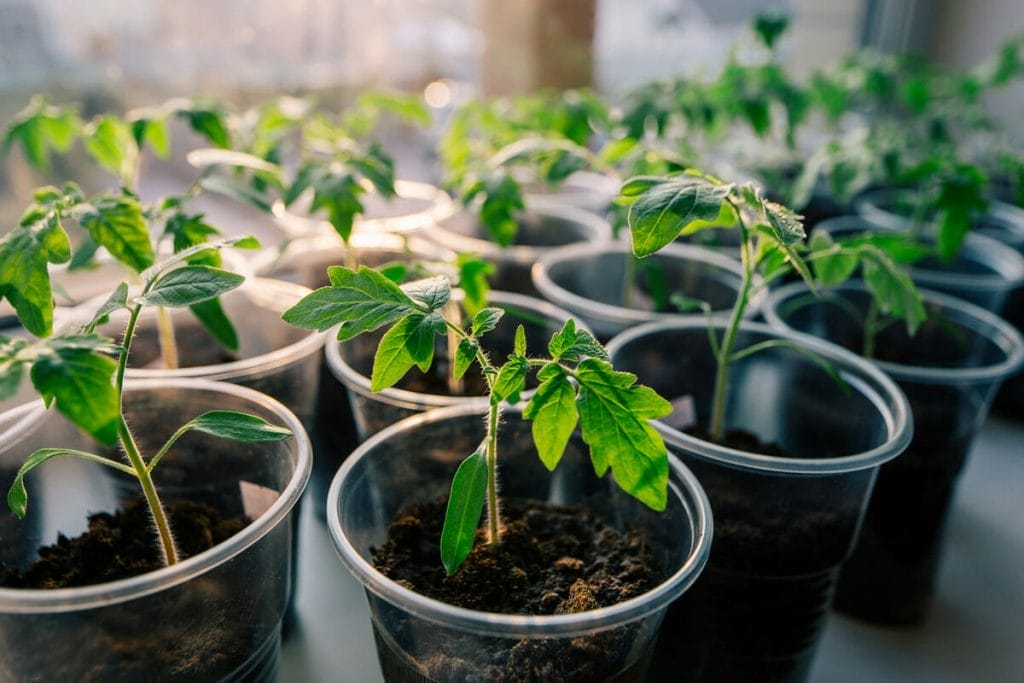
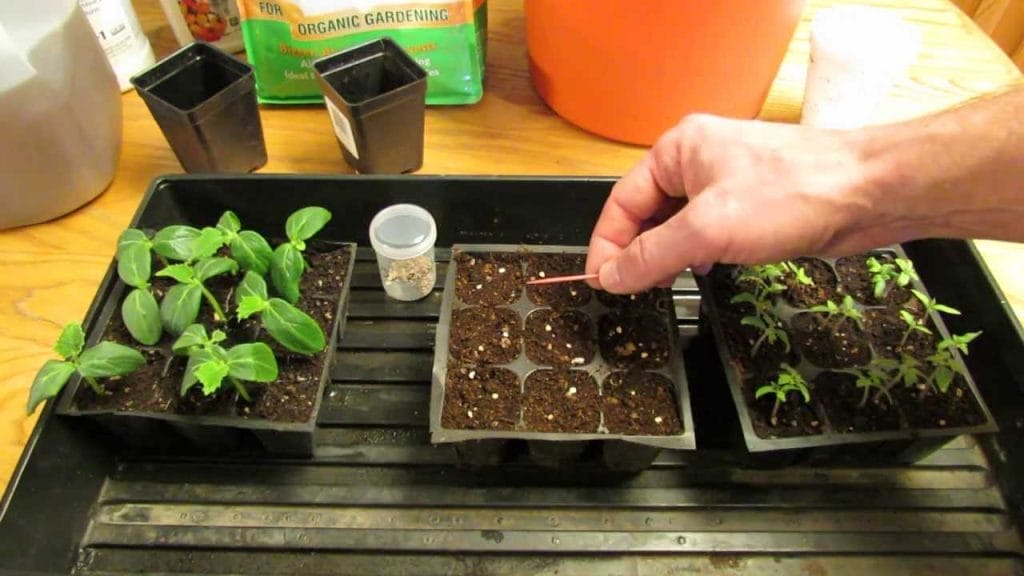
- Seed Starting Trays or Small Pots: You’ll need containers to sow your tomato seeds in. You can use either seed starting trays with individual cells or small pots with drainage holes. Seed starting trays are convenient because they allow you to sow many seeds in a compact space, and the individual cells help prevent the roots of your seedlings from becoming entangled. If using small pots, choose ones that are at least 2-3 inches deep to provide enough room for the roots to grow. Make sure your containers are clean and have proper drainage to prevent waterlogging and disease.
- Spray Bottle for Watering: A spray bottle is an essential tool for gently watering your newly sown seeds and delicate seedlings. Tomato seeds and young seedlings are very sensitive to overwatering and rough handling, so using a spray bottle allows you to mist the soil surface and keep it evenly moist without disturbing the seeds or damaging the fragile stems and leaves. Look for a spray bottle with an adjustable nozzle that can produce a fine mist.
- Grow Lights: Providing your tomato seedlings with plenty of bright, direct light is crucial for their healthy growth and development. While you can start your seeds on a sunny windowsill, it’s often better to use artificial grow lights to ensure your seedlings receive consistent, high-quality light. You can use either fluorescent or LED grow lights, which are energy-efficient and provide the full spectrum of light that plants need. Hang your grow lights just a few inches above your seedlings and keep them on for 12-16 hours per day.
- Plant Labels and Markers: Labeling your seed trays or pots is important for keeping track of the varieties you’ve sown and their sowing dates. You can use either plastic plant labels or wooden popsicle sticks as markers, and write on them with a permanent marker or pencil. Be sure to label your containers as soon as you sow your seeds to avoid mix-ups later on.
- Heat Mat (Optional): While not strictly necessary, a heat mat can be a helpful tool for improving germination rates and speed, especially if you’re starting your seeds in a cool room or during the early spring when temperatures may be lower than ideal. Heat mats are designed to provide consistent bottom heat to your seed trays, which can help maintain the optimal temperature range for germination (75°F to 80°F). Some heat mats come with built-in thermostats that allow you to precisely control the temperature.
- Humidity Dome (Optional): A humidity dome is a clear plastic cover that fits over your seed trays to create a warm, moist environment that can speed up germination. While not essential, a humidity dome can be helpful if you live in a dry climate or if your indoor air is particularly dry. Just be sure to remove the dome as soon as your seeds sprout to prevent damping off and provide your seedlings with good air circulation.
By gathering all of these materials before you start sowing your tomato seeds, you’ll be well-prepared to give your seedlings the best possible start in life. In the next section, we’ll discuss some best practices for sowing and caring for your tomato seedlings to ensure their healthy growth and development.
Best Practices for Sowing and Caring for Tomato Seedlings
Now that you have all the necessary materials, it’s time to dive into the best practices for sowing and caring for your tomato seedlings. By following these guidelines, you’ll be able to give your seedlings the best possible start and set them up for success in your garden.
Timing and Sowing Depth
One of the most important factors in successfully starting tomato seeds indoors is timing. Most gardeners recommend starting tomato seeds indoors about 6-8 weeks before the last expected frost date in your area. This gives your seedlings plenty of time to grow and develop before they need to be transplanted outdoors.
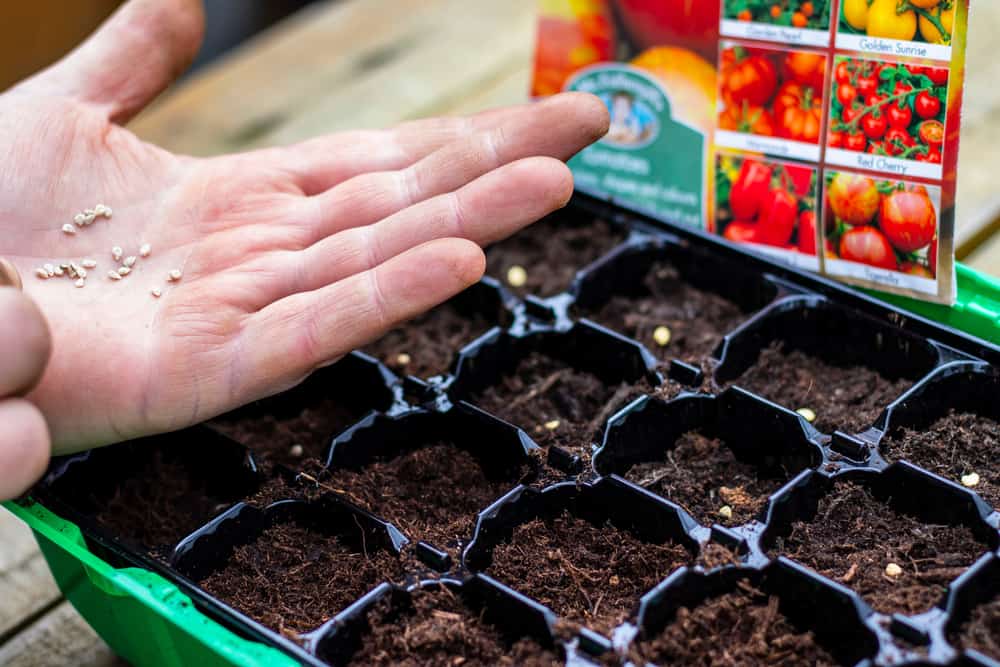
When sowing your tomato seeds, aim to plant them about 1/4 inch deep in your seed starting mix or potting soil. This depth provides enough cover to keep the seeds moist and protected while still allowing them to push through the soil surface when they germinate easily. If you plant your seeds too deeply, they may struggle to emerge and could even rot before they have a chance to sprout.
Sowing Density and Thinning
Another key consideration when sowing tomato seeds is the density of your planting. Sowing 2-3 seeds per pot or cell in your seed starting tray is generally recommended. This allows you to hedge your bets in case some of your seeds don’t germinate and also allows you to select the strongest, healthiest seedling in each pot or cell to grow on.
Once your seedlings have developed their first set of true leaves (the second set of leaves that emerge after the initial seed leaves or cotyledons), it’s time to thin them out. Using a pair of scissors or small snips, carefully cut away the weaker seedlings at the soil level, leaving just the strongest, most vigorous seedling in each pot or cell. This may feel like a ruthless process, but it’s essential for preventing overcrowding and competition for resources, which can lead to weak, spindly growth.
Watering and Moisture Management
Proper watering is crucial for the health and development of your tomato seedlings. The goal is to keep the soil consistently moist but not waterlogged, as too much moisture can lead to damping off and other fungal diseases.
The best way to water your seedlings is from the bottom, by placing your seed trays or pots in a larger tray filled with about an inch of water. This allows the soil to absorb moisture from the bottom up, encouraging deeper root growth and preventing the delicate stems and leaves from getting wet.
Be sure to remove your trays or pots from the watering tray once the soil surface feels moist to the touch, and allow any excess water to drain away. Watering from the bottom also helps to flush out any accumulated salts or fertilizers that can build up in the soil over time.
Light and Temperature
As mentioned earlier, providing your tomato seedlings with plenty of bright, direct light is essential for their healthy growth and development. Once your seeds have germinated, place your seedlings under grow lights or in a sunny south-facing window, and keep the lights on for 12-16 hours per day. If using grow lights, position them just a few inches above the tops of your seedlings and adjust the height as the plants grow to maintain the proper distance.
In addition to light, temperature is another important factor in the growth and development of your tomato seedlings. Aim to maintain air temperatures around 65-75°F (18-24°C) during the day, with a slight drop of about 5-10°F (3-5°C) at night. This slight temperature difference helps to prevent leggy growth and encourages your seedlings to develop strong, sturdy stems.
Potting Up and Fertilizing
As your tomato seedlings grow and develop, they may outgrow their original pots or cells and need to be potted up into larger containers. This is typically necessary once your seedlings have developed their second or third set of true leaves and the roots have begun to fill out the original container.
When potting up your seedlings, be sure to use a slightly larger pot (about 2-4 inches in diameter) and a high-quality, well-draining potting mix. Gently lift your seedlings out of their original pots, being careful not to damage the delicate roots, and plant them at the same depth in their new containers.
Once your seedlings are established in their new pots, you can begin to fertilize them with a dilute, balanced liquid fertilizer every 7-10 days. Be sure to follow the manufacturer’s instructions for dilution and application rates, as over-fertilizing can burn the delicate roots and foliage of your seedlings.
Hardening Off and Transplanting
As your tomato seedlings grow and the weather begins to warm up outside, it’s important to start preparing them for life in the garden. This process, known as hardening off, involves gradually acclimating your seedlings to outdoor conditions over the course of a week or two.
To harden off your seedlings, start by placing them outdoors in a sheltered, shaded location for a few hours a day, gradually increasing the amount of time and direct sunlight they receive each day. Be sure to protect your seedlings from strong winds and extreme temperatures, and bring them back indoors at night if temperatures dip below 50°F (10°C).
Once your seedlings are fully hardened off and the risk of frost has passed, it’s time to transplant them into your garden. Choose a sunny location with well-draining soil, and plant your seedlings about 2-3 feet apart, depending on the variety. Be sure to water your seedlings well after transplanting and mulch around the base of the plants to help retain moisture and suppress weeds.
By following these best practices for sowing and caring for your tomato seedlings, you’ll be well on your way to growing a bountiful crop of delicious, homegrown tomatoes. In the next section, we’ll discuss some common mistakes to avoid when starting tomato seeds indoors.
Common Mistakes to Avoid
Starting tomato seeds indoors can be a rewarding and enjoyable process, but it’s not without its challenges. Even experienced gardeners can fall victim to some common mistakes that can lead to weak, spindly seedlings or even complete failure. Here are some of the most common mistakes to avoid when starting tomato seeds indoors:
Starting Seeds Too Early
One of the most common mistakes gardeners make when starting tomato seeds indoors is starting them too early. While it may be tempting to get a head start on the growing season, sowing your seeds too far in advance can lead to a host of problems.
If your seedlings outgrow their pots or trays before it’s time to transplant them outdoors, they can become root-bound, stunted, and stressed. This can lead to weak, spindly growth and make your seedlings more susceptible to disease and pest problems.
To avoid this issue, be sure to follow the recommended timeline for starting your tomato seeds based on your local climate and last frost date. Most experts recommend starting tomato seeds indoors about 6-8 weeks before your last expected frost date.
Insufficient Light
Another common mistake when starting tomato seeds indoors is not providing enough light for your seedlings. Tomato seedlings require a lot of bright, direct light to grow strong and sturdy, and without it, they can quickly become weak, leggy, and prone to toppling over.
If you’re relying on natural light from a window, your seedlings may not be getting enough light, especially if the window is facing north or east. In these cases, it’s best to supplement with artificial grow lights to ensure your seedlings receive the light they need.
When using grow lights, be sure to position them just a few inches above the tops of your seedlings and keep them on for 12-16 hours per day. As your seedlings grow, adjust the height of the lights to maintain the proper distance and prevent the leaves from touching the bulbs.
Overwatering
Overwatering is another common mistake that can lead to a host of problems for your tomato seedlings. While it’s important to keep the soil consistently moist, too much water can lead to damping off, a fungal disease that can quickly kill young seedlings.
To avoid overwatering, be sure to use a well-draining seed starting mix or potting soil and containers with proper drainage holes. Water your seedlings from the bottom by placing your trays or pots in a larger tray filled with water, and allow the soil to absorb moisture from the bottom up.
Be sure to remove your trays or pots from the watering tray once the soil surface feels moist to the touch, and allow any excess water to drain away. Avoid getting water on the leaves or stems of your seedlings, as this can promote fungal growth and disease.
Failure to Thin Seedlings
When sowing tomato seeds, it’s common to plant 2-3 seeds per pot or cell to ensure at least one seedling emerges. However, once your seedlings have developed their first set of true leaves, it’s important to thin them out to prevent overcrowding and competition for resources.
Failing to thin your
seedlings can lead to weak, spindly growth and reduced yields later in the season. When seedlings are overcrowded, they have to compete for light, water, and nutrients, which can stunt their growth and development.
To avoid this issue, use a pair of scissors or small snips to carefully cut away the weaker seedlings at the soil level, leaving just the strongest, most vigorous seedling in each pot or cell. While it may feel wasteful to remove perfectly healthy seedlings, it’s essential for promoting strong, healthy growth and maximizing your yields.
Fertilizing Too Soon or Too Much
Another common mistake when starting tomato seeds indoors is fertilizing too soon or too much. While it may be tempting to give your seedlings a boost with fertilizer right away, it’s important to wait until they have developed their second or third set of true leaves before fertilizing.
Fertilizing too soon can actually burn the delicate roots of your seedlings and stunt their growth. When you do start fertilizing, be sure to use a dilute, balanced liquid fertilizer and follow the manufacturer’s instructions for dilution and application rates.
Over-fertilizing can also be a problem, as it can lead to excessive foliage growth at the expense of fruit production. Stick to a regular fertilizing schedule (every 7-10 days) and avoid the temptation to give your plants too much fertilizer, as this can do more harm than good.
Skipping the Hardening Off Process
Finally, one of the most common mistakes gardeners make when starting tomato seeds indoors is skipping the hardening off process before transplanting their seedlings outdoors. Hardening off is the process of gradually acclimating your seedlings to outdoor conditions, such as wind, sun, and temperature fluctuations.
If you skip this crucial step and transplant your seedlings directly from the protected environment of your home to the harsh conditions of your garden, they can quickly become stressed and may even die from shock.
To avoid this issue, be sure to harden off your seedlings gradually over the course of a week or two before transplanting them outdoors. Start by placing them in a sheltered, shaded location for a few hours a day, gradually increasing the amount of time and direct sunlight they receive each day.
Be sure to protect your seedlings from strong winds and extreme temperatures, and bring them back indoors at night if temperatures dip below 50°F (10°C). By taking the time to properly harden off your seedlings, you’ll help ensure a smooth transition to the garden and set them up for success.
Conclusion
Starting tomato seeds indoors can be a fun and rewarding process that allows you to get a head start on the growing season and enjoy a bountiful harvest of delicious, homegrown tomatoes. By following the best practices outlined in this article and avoiding some of the most common mistakes, you’ll be well on your way to growing strong, healthy tomato seedlings that will thrive in your garden.
Remember to start your seeds at the right time, provide them with plenty of bright, direct light, and keep the soil consistently moist but not waterlogged. As your seedlings grow and develop, be sure to thin them out, pot them up into larger containers, and fertilize them regularly with a dilute, balanced liquid fertilizer.
When it’s time to transplant your seedlings outdoors, don’t forget to harden them off gradually to help them acclimate to outdoor conditions. With a little patience, care, and attention to detail, you’ll be able to enjoy a bountiful harvest of delicious, homegrown tomatoes all season long.


