
How to Grow Potatoes in a Pot: Simple Steps for Small Spaces
Growing potatoes in a pot is a convenient and accessible method for gardeners with limited space or who wish to try container gardening. This approach allows you to control soil quality and growing conditions, making it ideal for optimizing the potato growth cycle. Potatoes are a versatile crop, and adapting to pot cultivation does not significantly alter their basic requirements: light, water, and good soil.
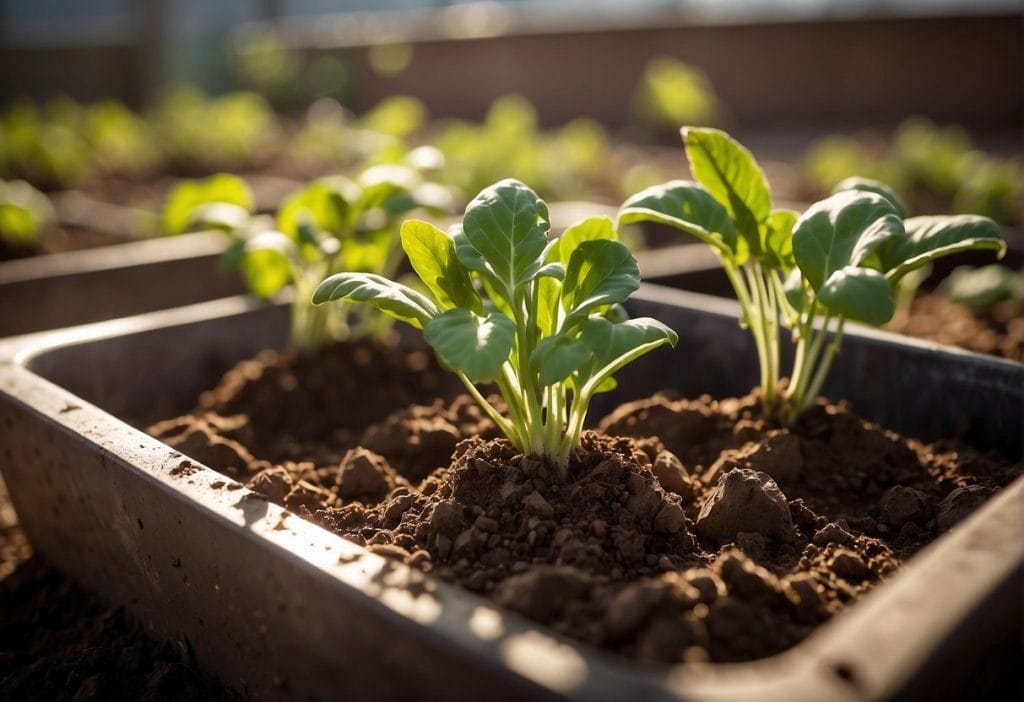
To begin, select the right variety of seed potatoes tailored for pot growth, ensuring they are disease-free to give your crop the best start. Proper preparation of these seed potatoes is crucial; they should be chitted—sprouted in a cool, light place—to encourage strong shoots before planting. Choosing an appropriately sized pot with adequate drainage is essential for preventing waterlogged soil, which can lead to rotten tubers.
Maintaining consistent moisture levels in the soil is key, but be wary of overwatering which can lead to the same detrimental effects as poor drainage. As the plants grow, periodic ‘hilling’ or adding soil around the stems is necessary to cover the growing tubers and protect them from sunlight, which can turn them green and toxic. With proper care, your potted potatoes will develop into a healthy, bountiful harvest ready to be enjoyed at your table.
Choosing the Right Container

When it comes to growing potatoes in pots, selecting the right container is crucial for ensuring healthy plant development and yield.
Container Size and Material
Your container’s size will determine how many potato plants you can grow and, consequently, the volume of the harvest. Potatoes need sufficient room to form tubers; hence, a large pot or container is ideal. Containers should be at least 18 inches deep and capable of holding at least 10 to 15 gallons to provide ample space for growth.
Materials for potato pots can vary:
- Plastic pots are lightweight and retain moisture well.
- Clay or terracotta containers are porous, offering good airflow but may dry out quicker.
- Wooden boxes promote good drainage but can rot over time.
- Grow bags are breathable and encourage healthy root systems.
- Old tires can be stacked to increase depth as plants grow, although there are concerns about leaching of toxic materials from the rubber.
Drainage Essentials
Proper drainage is non-negotiable for potato growth. Your selected container must have multiple drainage holes on the bottom to prevent waterlogging. You can create additional drainage by laying a layer of gravel or broken pot shards at the base of the pot before adding soil. This will ensure that water flows freely, which is vital to avoid root rot. If you’re using a bucket, make sure to drill enough holes if it doesn’t already have them.
Selecting Seed Potatoes

When you’re planning to grow potatoes in pots, choosing the right type of seed potatoes is crucial for successful growth. Seed potatoes are essentially potatoes used for planting rather than consumption. They have eyes or growth nodes that turn into the green shoots you see growing on old potatoes.
Understanding Seed Potato Types
Seed potatoes come in a variety of types, each with its own characteristics and growth requirements. They are categorized into early, mid-season, and late varieties, referring to the time it takes for them to mature:
- Early varieties: Harvest in about 75-90 days
- Mid-season varieties: Harvest in about 95-110 days
- Late varieties: Harvest in 120+ days
Choose a variety that suits your climate and growing season. Certified seed potatoes are recommended as they’re disease-free and have been tested for purity and quality. Avoid using grocery store potatoes as they might have been treated to prevent sprouting and can carry diseases.
Preparing Seed Potatoes for Planting
Before planting, seed potatoes need to be prepped correctly to ensure healthy growth. Follow these steps to prepare your seed potatoes:
- Cutting: If the seed potato is large, cut it into chunks about the size of a golf ball, ensuring each piece has at least 2-3 eyes. Use a clean, sharp knife to prevent bacterial infection.
- Curing: Allow the cut surfaces to callus over by leaving them in a cool, dry place for a few days. This helps protect the seed potato from rot when planted.
Remember, well-prepared seed potatoes are the basis for a healthy and bountiful potato harvest in pots.
Potting Mix and Soil Preparation

Crafting the right potting mix and preparing your soil is crucial for growing healthy potatoes in pots. The soil should be well-draining yet nutrient-rich to support growth.
Optimal Soil Mix
Your main aim is to create a potting mix that ensures good drainage and aeration. An optimal soil mix for potatoes generally contains a blend of the following:
- 60% potting soil – Acts as the base.
- 30% compost – Enriches the soil with organic matter.
- 10% perlite or peat moss – Improves soil structure and drainage.
This mix maintains moisture while preventing waterlogging, which is harmful to potato roots. Ensure the pH level of your mix stays between 6.0 and 6.5, which is slightly acidic and ideal for potatoes.
Enhancing Soil with Nutrients
Potatoes are heavy feeders, so soil enhancement is necessary. Start by mixing in organic fertilizer or vegetable-specific fertilizer to your potting mix before planting. This will provide a slow release of nutrients essential for plant growth. Consider also integrating a layer of compost into the top few inches of your soil after initial planting, to further enrich the medium. Nutrients are vital throughout the growth cycle, so an additional side-dressing of fertilizer or compost around mid-season can be beneficial.
Planting and Spacing
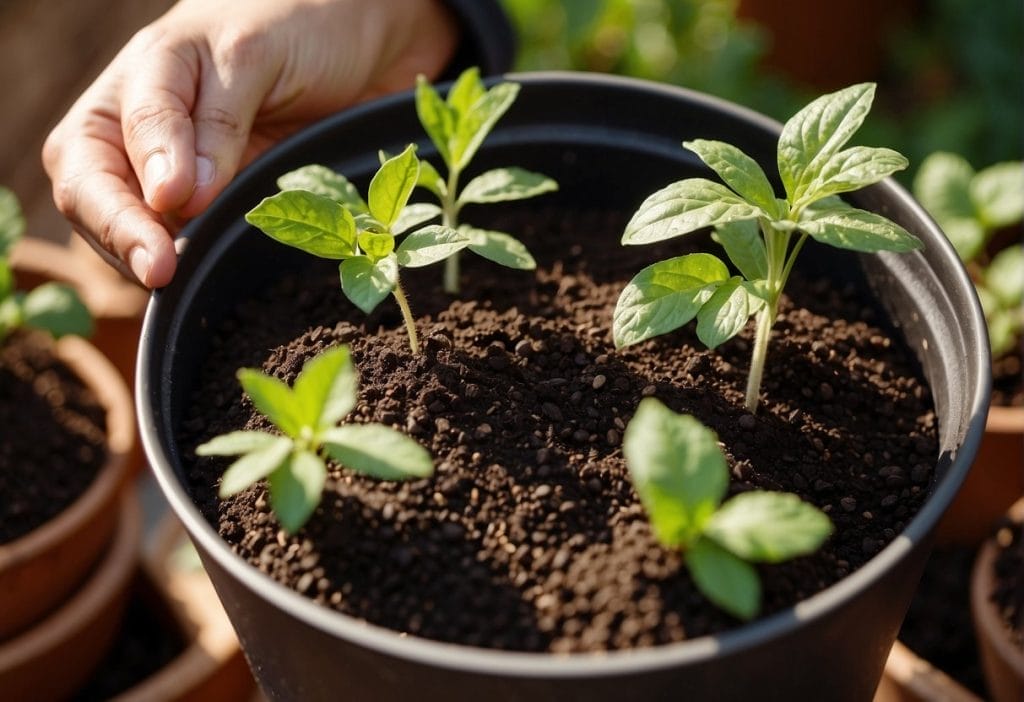
When you’re planting potatoes in containers, the process begins with selecting the right size of pot and preparing your seed potatoes. Choose a pot that is at least 12 inches deep and has adequate drainage holes to prevent waterlogged soil.
Preparing Seed Potatoes:
- Use a clean knife to cut large seed potatoes into chunks, ensuring each piece has several eyes.
- Small seed potatoes can be planted whole.
- Allow cut pieces to cure for a day or two to form a callus over the cuts, which helps prevent rot.
Planting Steps:
- Fill your pot with a 6-inch layer of high-quality, well-draining potting soil.
- Place the seed potatoes eyes facing upward, spaced 5 to 7 inches apart.
- Cover the potatoes with an additional 3 to 4 inches of soil.
Optimal Spacing:
| Planting Depth | Distance Between Potatoes | Soil Cover |
|---|---|---|
| 6 inches | 5 to 7 inches | 3 to 4 inches |
As the potato plants grow, you’ll need to “hill” them by mounding additional soil around the stems to bury the lower portion. This ensures more potatoes form and are protected from sunlight, which can turn them green and toxic. Leave the top few inches of the plant exposed, and continue to hill as the plant grows.
Remember:
- Regularly check moisture levels; growing potatoes in containers require careful watering to maintain even soil moisture without waterlogging.
- Ensure proper sunlight exposure – potatoes need full sun to thrive.
Watering and Moisture Control
Ensuring correct watering and moisture levels is crucial for growing healthy potatoes in pots. The goal is to maintain evenly moist soil without causing waterlogging, which can lead to root diseases.
Watering Techniques
When watering your potatoes, deep and consistent hydration is key. Here’s a precise approach:
- Initial Watering: After planting, thoroughly water the pot, ensuring even soil moisture to a depth of 4 to 6 inches.
- Regular Watering: Subsequent watering should be done every 1 to 3 days, depending on weather conditions, to maintain consistent soil moisture. Use a watering can or drip system to apply water directly to the soil—not the foliage—to avoid disease.
To gauge when it’s time to water, check the soil:
- Stick your finger 2 inches into the soil.
- Dry soil: It’s time to water.
- Moist soil: Wait a day, then check again.
Remember, even moisture is crucial; fluctuations can lead to growth issues like cracking.
Adjusting Watering Based on Climate
Your watering routine will vary with climate conditions:
- Hot/Arid Climates:
- Increase frequency of watering.
- Employ mulching to retain moisture.
- Consider partial shade to reduce evaporation.
- Cool/Humid Climates:
- Water less frequently.
- Ensure your pot has ample drainage holes to prevent waterlogging.
Always monitor soil moisture levels and adjust your watering schedule accordingly. Proper drainage in the pot ensures that any excess water can escape, preventing root rot.
Sunlight and Temperature
Growing potatoes in a pot requires careful consideration of sunlight and temperature, as these factors are crucial for healthy growth. Your potatoes need ample sun and stable temperatures to thrive.
Sunlight Requirements
Potatoes need full sun to grow effectively. This means positioning your pot in a location where it can receive at least 6 to 8 hours of direct sunlight each day. If you live in an apartment and plan to grow potatoes on your balcony or patio, ensure that the area is not overly shaded by nearby structures or trees.
- Sunlight Tips:
- Secure a spot that gets continuous sunlight.
- Rotate the pot occasionally to ensure all sides receive sun.
Temperature Considerations
While potatoes are adaptable, they prefer cool to moderate temperatures for optimal growth. The ideal temperature range is between 45°F (7°C) and 70°F (21°C). It’s important to shield your potatoes from frost, as frost can damage and even kill the plants.
- Temperature Tips:
- Start planning your potato planting after the risk of frost has passed.
- During hot weather, provide some afternoon shade to avoid overheating.
Nutrition and Feeding
To ensure a healthy and productive potato crop, a balanced combination of nutrients and regular feeding is essential. Your potato plants rely on timely and appropriate fertilization to flourish.
When to Feed
Begin feeding your potatoes when they are about 6 inches tall. At this stage, they need more nutrients to support growth. You should continue to feed them regularly throughout the growing season, roughly every four to six weeks.
Choosing the Right Fertilizer
When selecting a fertilizer, consider a balanced vegetable fertilizer with equal parts nitrogen, phosphorus, and potassium (N-P-K). Here are some options:
- Organic Fertilizer: Organic options release nutrients slowly and improve soil structure.
- Example: Composted manure or seaweed-based fertilizers.
- Slow-Release Fertilizer: Granules break down over time, providing a steady supply of nutrients.
- Example: Pelletized chicken manure or coated complex fertilizers.
- Liquid Fertilizer: Provides a quick boost of nutrients, especially useful during key growth phases.
- Formula: Look for liquid feeds with a higher potassium content to promote flowering and tuber development.
Managing Pests and Diseases
In cultivating potatoes in pots, vigilance against pests and diseases is critical to ensure a healthy, robust crop. Use disease-free seed potatoes as your starting point to greatly reduce the risk of plant illnesses.
Common Pests
Potato plants can attract a variety of pests that can hinder their growth. Here are some frequently encountered ones:
- Colorado Potato Beetle: These yellow and black-striped beetles feed on the foliage. Handpick them off the plants and destroy them to manage low infestations.
- Aphids: These small, sap-sucking pests can cause growth issues. Apply insecticidal soap or remove them with a steady stream of water.
- Voles: Voles can damage plants by eating tubers. To deter them, ensure the pot is elevated, and consider installing a wire mesh at the base.
Disease Prevention
Preventing disease is easier than curing it, so here are strategies to keep your potatoes healthy:
- Good Hygiene: Always start with clean pots and fresh potting mix.
- Crop Rotation: Even in containers, try not to grow potatoes in the same soil year after year.
- Adequate Spacing: This ensures good air circulation and reduces the humidity that can encourage fungal diseases.
- Watering Practices: Water the soil directly, keeping the foliage dry to prevent fungal diseases.
The Growing Process
Growing potatoes in pots is a straightforward process that involves preparing tubers, understanding their growth stages, and implementing techniques like hilling to encourage a healthy crop.
Stages of Growth
When starting with seed potatoes, ensure they have growth nodes, commonly known as eyes. Cut the tubers into pieces, each with at least one or two eyes. Chitting is the process of letting them sprout before planting—this can be done by placing the seed potatoes in a warm, bright area for several days until sprouts form. Plant these chunks in about 6 inches of soil, with the eyes facing upwards.
Potatoes have a clear progression in their development:
- Sprout development: After planting, the eyes will sprout and roots will form.
- Vegetative growth: Foliage appears as the potato plant begins to grow upwards.
- Tubering: New potatoes develop underground adjacent to the plant.
- Flowering: Some potato varieties may produce flowers once mature, which generally occurs when the tubers are beginning to form.
Throughout these stages, it’s crucial to monitor and water the potato plant, providing 1-2 inches of water per week, including rainfall.
Hilling and Earth Up
Hilling, or “earthing up,” is essential to potato growth. As the potato plant grows and the foliage becomes more visible, you should begin hilling:
- Start hilling when plants are 6 to 8 inches tall by piling more soil around the base of the plant, covering the stem up to just below the top set of leaves.
- Repeat the hilling process every few weeks as the plant continues to grow. This promotes the development of more tubers and protects them from sunlight, which can cause greening and make them toxic.
Hilling is a critical process: potatoes need a thick layer of soil to protect them and allow for the growth of a healthy crop. Be careful not to damage the young shoots while adding soil. Use compost or straw as a covering material to block sunlight effectively and maintain moisture levels. As the stems grow, continue to hill until the soil reaches the top of the pot. When you notice that the foliage of your potato plant has begun to yellow and wilt, it’s a sign that the tubers are nearing maturity.
Growing potatoes in pots requires attention to these details to yield a bountiful harvest of new potatoes ready to be enjoyed.
Harvesting and Storing
Harvesting potatoes at the right time ensures their quality and longevity, and proper storage is key to maintaining that freshness. Here’s how you can identify when your potatoes are ready to harvest, the best techniques to do so, and tips to store them effectively.
Signs of Readiness for Harvest
Your potatoes are ready to harvest when the foliage begins to yellow and die back. Usually, this occurs about 10 to 12 weeks after planting. For new potatoes, which are smaller and more tender, you can start harvesting a few as soon as they reach the size of golf balls. Check by gently digging around the base of a plant with your hands.
Harvesting Techniques
When it’s time to harvest, use a spade or a fork to gently unearth the potatoes to avoid damage. Insert the tool well away from the plant to prevent slicing the tubers. Work your way in and lift the soil, bringing the potatoes to the surface. After digging, remove excess soil from the potatoes by hand but avoid washing them if you plan to store them.
Potato Storage Tips
To store your potatoes, cure them first by leaving them in a dark, well-ventilated location for about one to two weeks at 45-60°F (7-15°C). This allows their skin to thicken, which helps in preservation. After curing, store them in a cool, dark, and dry place. Maintain a consistent temperature of about 40°F (4°C) to prevent sprouting. For storage, a cardboard box, paper bag, or a basket works well to provide adequate air circulation. Check regularly for any signs of spoilage or rotting and remove affected potatoes to prevent the spread to the others.
Additional Tips and Tricks
When you’re venturing into container gardening, particularly for growing potatoes, some specific considerations can make a significant difference in your overall success. Here are some tips and tricks:
- Selection of Container: Make sure to choose a container that is deep enough to accommodate the growth of your potatoes. It should also have sufficient drainage holes. Breathable materials like fabric pots are suitable as they prevent overwatering.
- Potting Mix: For optimal growth, mix in a high-quality potting mix with some well-rotted compost. The inclusion of compost not only increases fertility but also improves soil structure for better root growth.
- Positioning Seed Potatoes: Plant your growth nodes, or ‘eyes’, facing upwards. This will ensure that the sprouts have the easiest access to the surface.
- Spacing: Avoid overcrowding your container. A standard rule is to maintain at least 5 inches of space between each seed potato to give each plant enough room to grow.
- Light Exposure: Potatoes thrive in full sunlight, so place your pots in an area that receives around 6 to 8 hours of sunlight daily.
- Avoid Overwatering: Be cautious with the watering regimen for your potatoes. Potatoes prefer consistent moisture, but overwatering can lead to rot. Use a drip irrigation system to maintain an even moisture level and target the roots directly.
| Key Consideration | Importance |
|---|---|
| Drainage | Prevents rot |
| Potting Mix Composition | Enhances growth |
| Light Exposure | Maximizes yield |
| Watering Techniques | Reduces disease |
By following these additional tips, your venture in using a small garden space for container gardening can be as fruitful as possible. Remember to keep an eye on your plants and adjust your care techniques as needed.
Frequently Asked Questions
What type of soil is best for growing potatoes in pots?
Your container-grown potatoes need loose, well-draining, nutrient-rich soil. A mix of sand, silt, and clay in equal parts is ideal. Opt for a high-quality potting mix to ensure the best growth.
How should I prepare seed potatoes for planting?
Allow your seed potatoes to sprout in a warm spot for a few days. For more plants, cut the seed potatoes into chunks with at least one or two eyes.
What is the proper planting depth for potatoes in containers?
Plant your seed potatoes with the eyes facing up, about 2-4 inches deep, keeping space between them for optimal growth.
How much space do potatoes need to grow in containers?
Space the seed potatoes about 5 inches apart to ensure each plant has enough room to develop.
How many seed potatoes should I plant in one container?
Depending on the size of the container, plant 3 to 4 seed potatoes. Ensure it’s not overcrowded to allow for adequate growth.
Do I need to add anything to the soil for growing potatoes?
Enrich your soil with compost and consider adding a mix of blood meal and bone meal for extra nutrients. Also, check the pH level to ensure it’s slightly acidic, around 5.0-7.0.
How often should I water my potato plants?
Keep the soil consistently moist but not waterlogged. Overwatering can lead to root rot and under-watering can stress the plants.
Remember, plenty of sunshine and care will yield a bountiful potato harvest from your pot!


